One of the many great things about the Yoast SEO plugin is that it automatically generates an XML sitemap for your website. This file acts as a resume for your website. It tells the search engines how to crawl and index the pages of your website.
Yoast’s automatically-generated sitemap needs customization. In this video and post, learn how to customize your WordPress XML sitemap using Yoast.
What is an XML Sitemap?
An XML sitemap is a list of pages on your website you want search engines to crawl and index. Sitemaps provide valuable information such as how many images are included on each page, when each page was last updated, and each page’s relative importance. In short, the XML sitemap says, “Search engine crawlers, please follow this path.”
An XML sitemap generated by Yoast SEO looks like this:
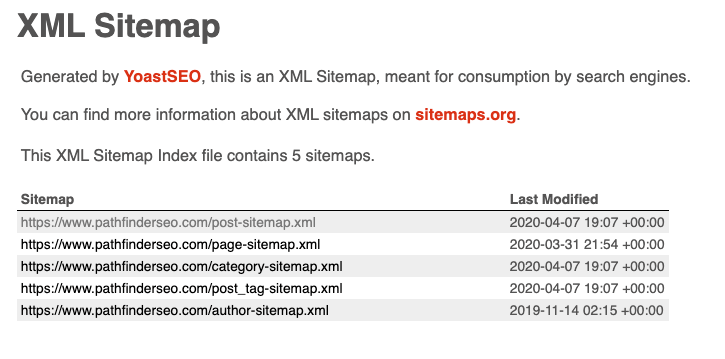
As you can tell by the look and feel, an XML sitemap isn’t user-oriented; it’s meant to communicate with the search engines.
When you look closely at a Yoast-generated sitemap, you’ll see that it’s actually an index of additional sitemaps based on content type. Each content type sitemap organizes all URLs associated with that particular type of content. Starting at the top of the sitemap index above, you’ll see it includes a sitemap each for posts, pages, categories, post_tags, and authors.
You can click on any one of the individual sitemaps to see all the pages/URLs on the site associated with that particular type of content.
What to Include/Exclude in Your Sitemap
Yoast SEO automatically creates a sitemap for your website. It’s your job to customize it so that it includes a URL for each page you want to have a chance of appearing in the search results.
You’ll want to exclude any URLs that point to pages with:
- Thin content – Content with little to no added value for users.
- Duplicate content – Content that appears at more than one URL.
What is your Yoast Sitemap URL?
Let’s locate your XML sitemap. Yoast plugin users will find it at www.mydomain.com/sitemap_index.xml.
How to Create a Yoast Sitemap
The steps outlined below will show you how to customize it for your unique website. We'll start by deciding which sitemaps you want your XML sitemap index to include. Then, we’ll look at individual content within each sitemap.
1. Log in to your WordPress website in one browser tab, and have your XML sitemap open in another tab.
2. Customize the Yoast settings relating to content types. In the left-hand menu of your WordPress website, hover over the Yoast SEO plugin, then click on Search Appearance. Click through the tabs at the top to get an idea of how Yoast organizes the controls for your various kinds of content.
Notice the dropdowns on the content type, taxonomies, and archives tabs. Each dropdown opens a control panel to help you optimize the way a particular kind of content will appear in the search results.
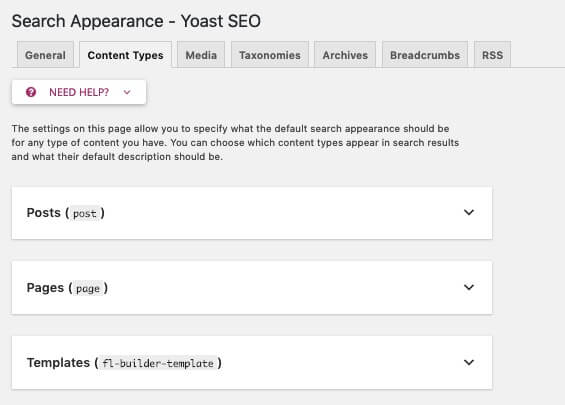
Each dropdown also includes a toggle that allows us to add or remove a particular kind of content from the XML sitemap. Yoast asks a simple question: “Show (individual sitemap) in search results?”
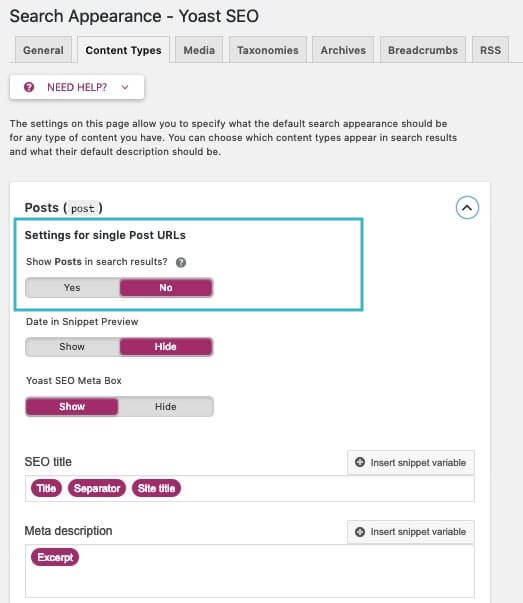
The default setting is usually Yes — for good reason. You generally want search engines to see all of your content unless you have a good reason for them not to.
Go through each content type listed and ask yourself if you want that type of content to appear in the search results. For most content types (like pages and posts), your answer should be Yes, unless those pages contain thin or duplicate content.
By leaving a particular content type set to Yes, Yoast will make sure to include that individual sitemap in your XML sitemap index.
If you set a content type sitemap to No, Yoast will remove that entire sitemap — along with all associated URLs — from your sitemap index. Yoast will also apply noindex robots meta directives to each piece of content in that sitemap, further ensuring robots won’t find and index them. Make sure you’re positive you don’t want search engines seeing any of that content before setting it to No.
3. Continue with this exercise for the Taxonomies and Archives tabs in the Search Appearance portion of the Yoast SEO plugin.
It’s likely that you do want the search engines to show your Categories and Tags. We will optimize these taxonomies so they’re even more valuable to the search engines in an upcoming monthly task.
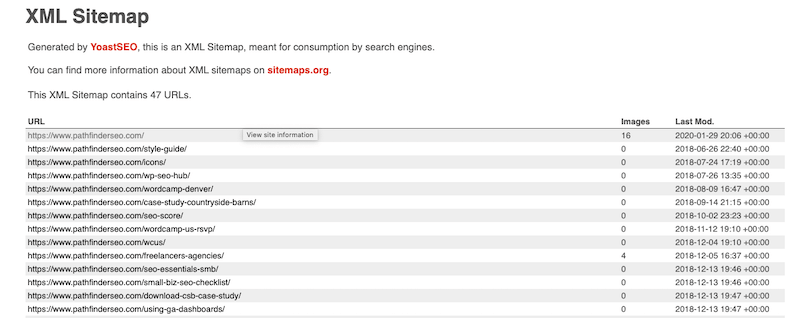
4. Customize individual sitemaps. Open your XML sitemap index. Click on the individual sitemaps so that each opens in a new tab.
Our goal is to evaluate the pages included in each individual sitemap. Go through each sitemap, URL by URL, asking yourself if each piece of content will benefit users.
If you find pages such as /hello-world or /testing-123 that signal they may be of low value to the search engines, open each in a new tab for evaluation at the page level. If they don’t contain content that could be valuable to users, you want to exclude those pages from your sitemap.
To exclude individual URLs from your XML sitemap, click on “Edit Page” at the top of each page or post you want to exclude.
In the page editor, scroll down to the Yoast SEO metabox. Click on the “Advanced Settings” gear icon and set “Allow search engines to show this Page in search results?” to “No.”
You can still allow search engines to follow the links on that page — even if it’s hidden — by leaving “Should search engines follow links on this Page?” set to “Yes.”
Leave this set to Yes unless there’s a reason you don’t want crawlers following the links that live on that page.
Finally, click "Update” in the top right corner of the page to save these settings. Repeat this process for each page you wish to exclude from each individual sitemap.
What's Next?
Nice work! You’ve customized your XML sitemap! Your final step is to submit this customized sitemap to Google via the Google Search Console.
STILL HAVE A QUESTION?
If you have more questions about this, feel free to reach out.